使用IDEA和gradle创建超市管理系统(壹)-- 环境配置

“IDEA是jetbrains公司开发的Java开发IDE,功能齐全。使用IDEA搭建SSM开发环境简单有效。本项目基于Spring,Spring MVC和MyBatis进行开发,模板引擎为Thymeleaf。”

概述

Gradle是一个基于Apache Ant和Apache Maven概念的项目自动化建构工具。它使用一种基于Groovy的特定领域语言(DSL)来声明项目设置,抛弃了基于XML的各种繁琐配置。

Spring MVC属于SpringFrameWork的后续产品,已经融合在Spring Web Flow里面。Spring 框架提供了构建Web应用程序的全功能MVC模块。

MyBatis本是apache的一个开源项目iBatis, 2010年这个项目由apache software foundation 迁移到了google code,并且改名为MyBatis 。2013年11月迁移到Github

准备工作

1.安装mysql,并完成相应数据库的建立

2.安装IDEA完整版或社区版

3.下载tomcat或其他服务器

创建工程

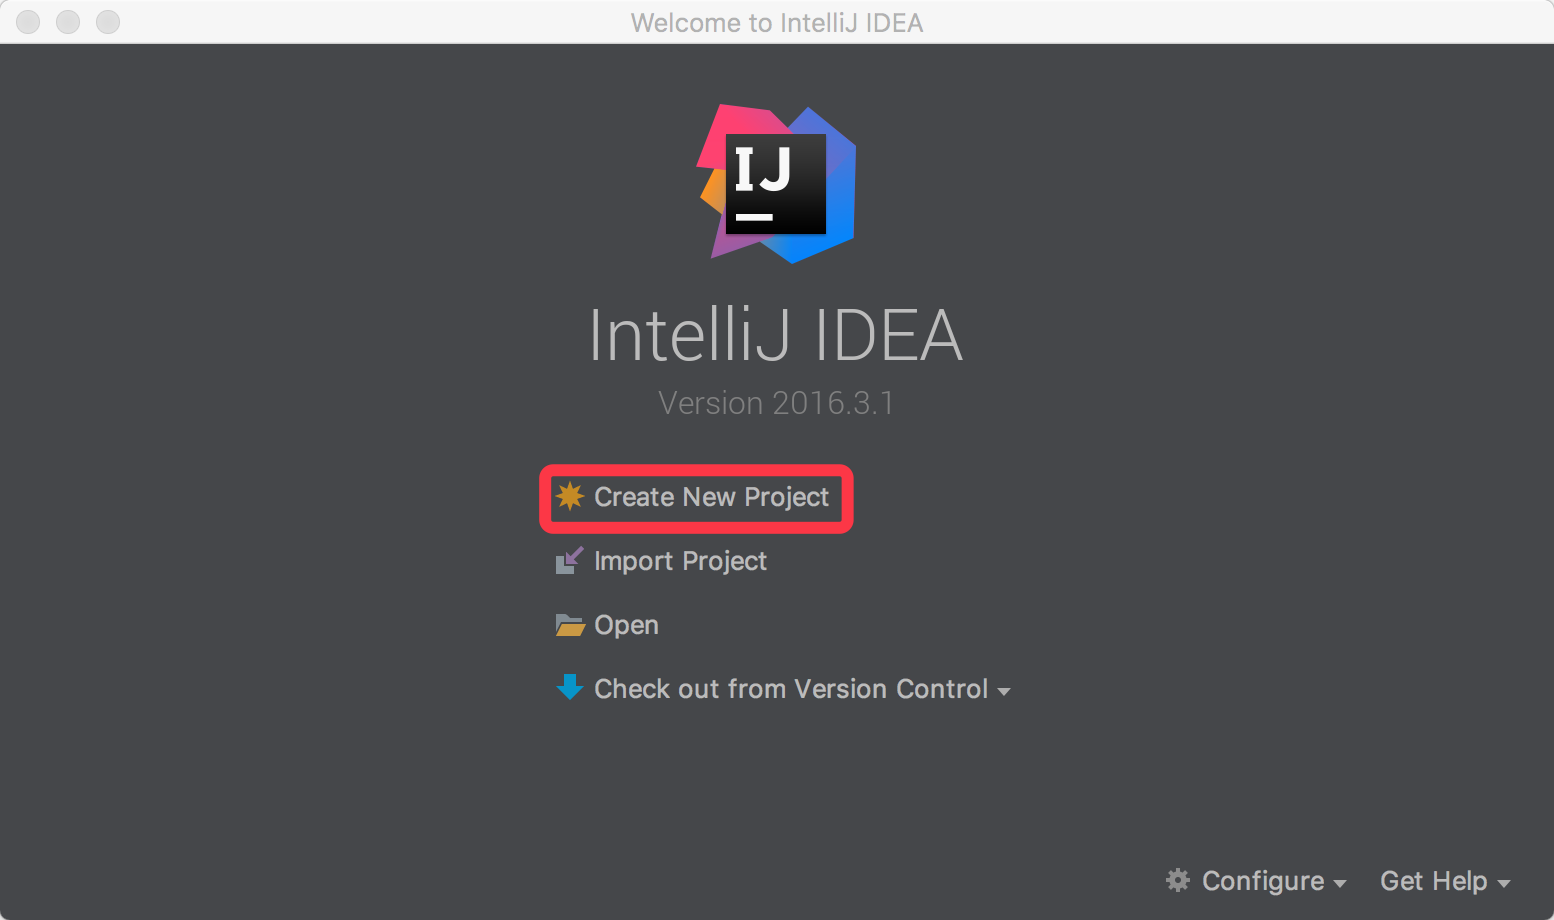
打开IDEA软件,选择Create New Project:

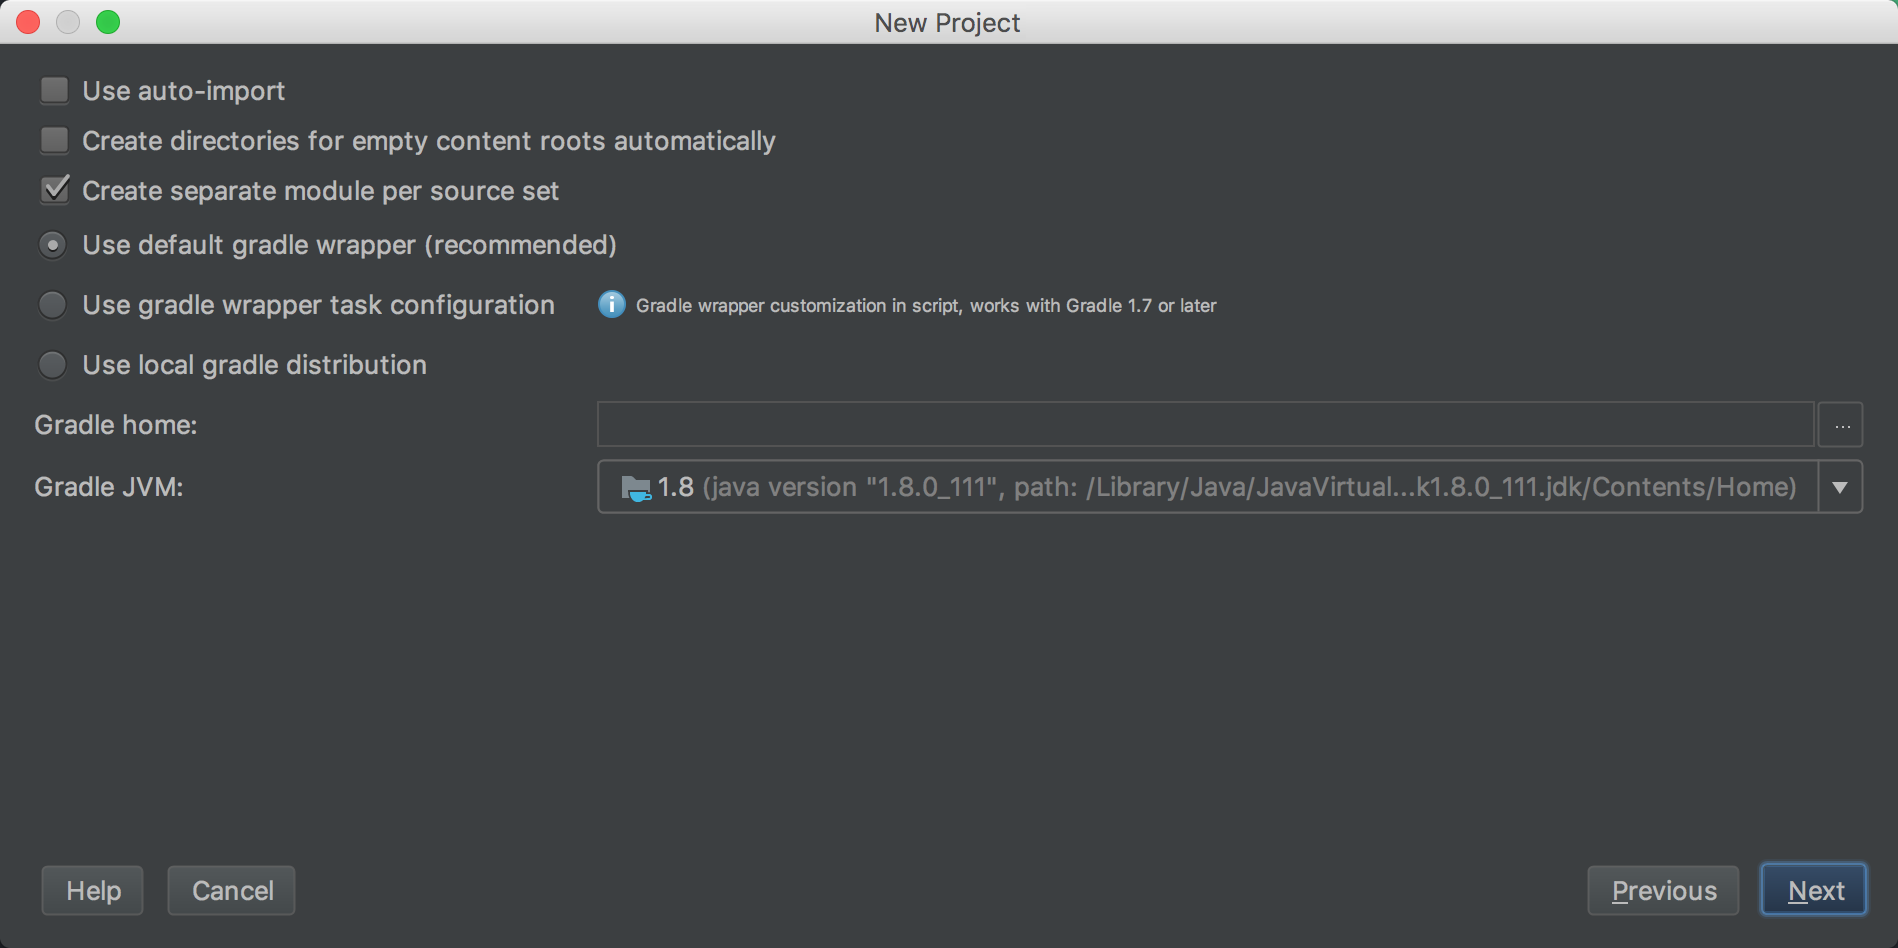
选择创建基于gradle的java web项目:

输入GroupId和ArtifactId:

选择gradle的来源,可以用自己下载的gradle,也可以使用IDEA内建的gradle版本:
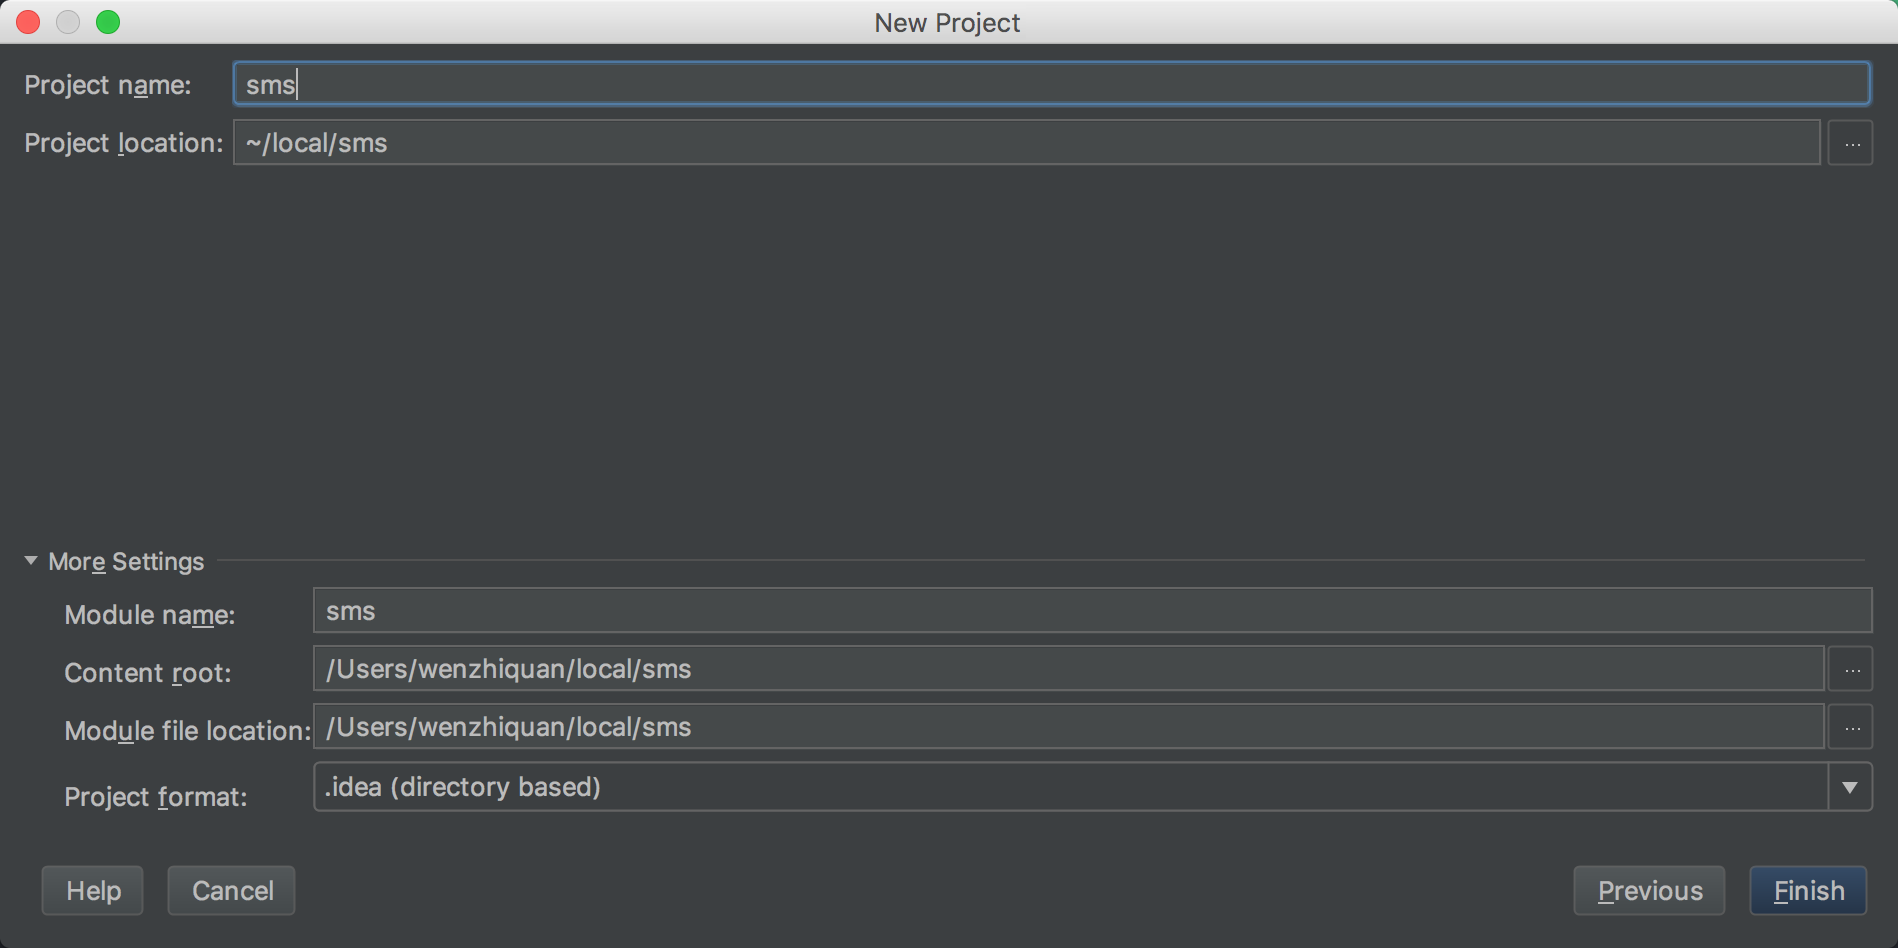
选择项目的目录:

点击完成,会生成一个最基本的java web目录,增加文件夹和相应文件,将其目录结构改为以下结构:

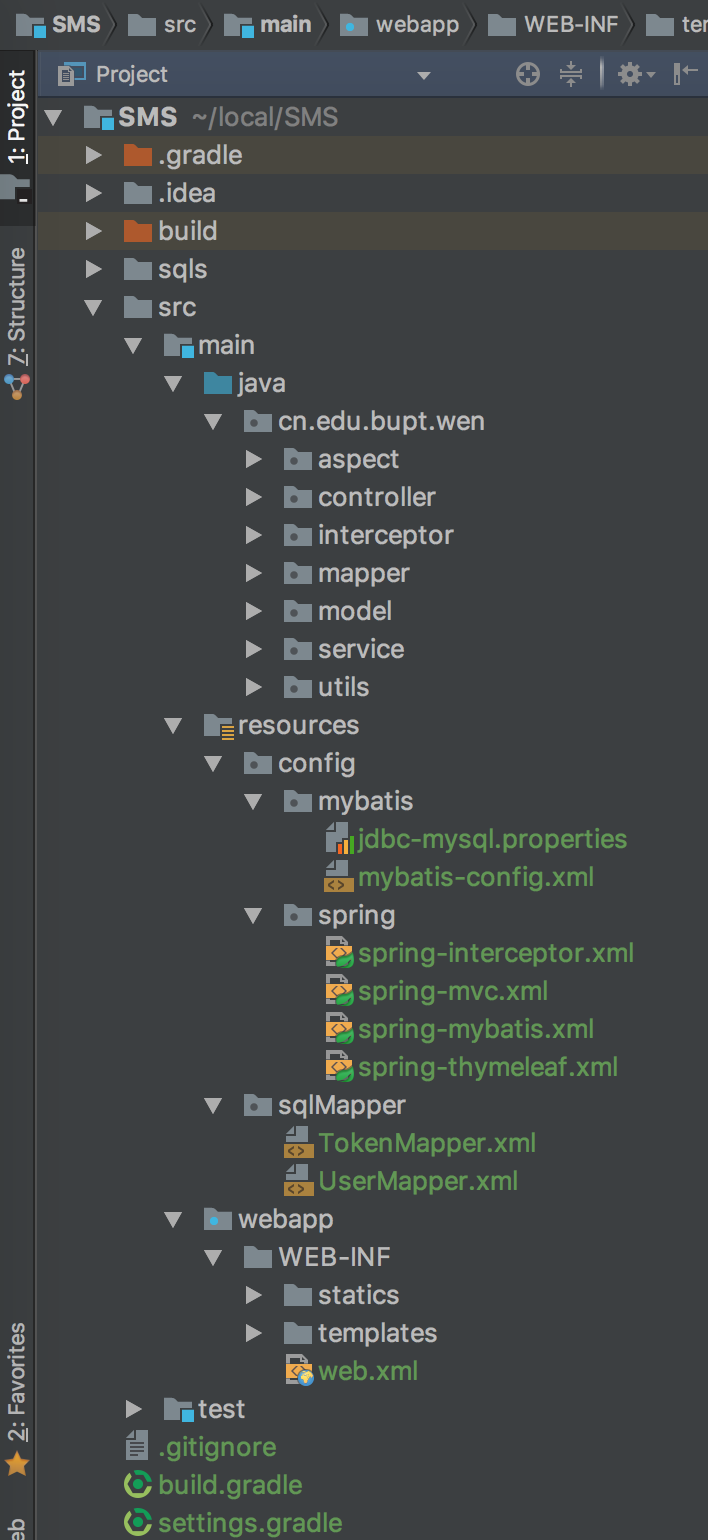
其中resources目录中的config文件夹中的文件和WEB-INF文件夹下的web.xml,
以及build.gradle都是自己进行配置的。

配置文件

spring-mvc.xml
1
2
3
4
5
6
7
8
9
10
11
12
13
14
15
16
17
18
19
20
21
22
23
24
25
26
27
<?xml version="1.0" encoding="UTF-8"?>
<beans xmlns="http://www.springframework.org/schema/beans"
xmlns:xsi="http://www.w3.org/2001/XMLSchema-instance"
xmlns:context="http://www.springframework.org/schema/context"
xmlns:mvc="http://www.springframework.org/schema/mvc" xmlns:aop="http://www.springframework.org/schema/aop"
xsi:schemaLocation="http://www.springframework.org/schema/beans
http://www.springframework.org/schema/beans/spring-beans.xsd
http://www.springframework.org/schema/context
http://www.springframework.org/schema/context/spring-context.xsd
http://www.springframework.org/schema/mvc
http://www.springframework.org/schema/mvc/spring-mvc.xsd http://www.springframework.org/schema/aop http://www.springframework.org/schema/aop/spring-aop.xsd">

<!-- 自动扫描控制器 -->
<context:component-scan base-package="cn.edu.bupt.wen"/>

<!-- 控制器映射器和控制器适配器 -->
<mvc:annotation-driven></mvc:annotation-driven>

<!--静态文件访问权限配置-->
<mvc:resources mapping="statics/**" location="/WEB-INF/statics/"/>

<!-- 启用aop -->
<aop:aspectj-autoproxy/>

<import resource="spring-mybatis.xml"></import>
<import resource="spring-thymeleaf.xml"></import>
</beans>
jdbc-mysql.properties
1
2
3
4
5
6
7
8
9
10
# 将jdbc.jarDirection后的内容更改为gradle下载的
# mysql-connector-java-5.1.x.jar所在的路径,gradle自动下载的路径如下所示
jdbc.jarDirection=/Users/wenzhiquan/.gradle/caches/modules-2/files-2.1/mysql\
/mysql-connector-java/5.1.40/ef2a2ceab1735eaaae0b5d1cccf574fb7c6e1c52/\
mysql-connector-java-5.1.40.jar
jdbc.driverClassName=com.mysql.jdbc.Driver
jdbc.url=jdbc:mysql://localhost:3306/nowcoder?\
useUnicode=true&characterEncoding=UTF-8&useSSL=false
jdbc.username=root
jdbc.password=root
spring-mybatis.xml
1
2
3
4
5
6
7
8
9
10
11
12
13
14
15
16
17
18
19
20
21
22
23
24
25
26
27
28
29
30
31
32
33
34
35
36
37
38
39
40
41
42
43
44
45
<?xml version="1.0" encoding="UTF-8"?>
<beans xmlns="http://www.springframework.org/schema/beans"
xmlns:xsi="http://www.w3.org/2001/XMLSchema-instance"
xsi:schemaLocation="http://www.springframework.org/schema/beans http://www.springframework.org/schema/beans/spring-beans.xsd">
<!-- 引入外部数据源配置信息 -->
<bean class="org.springframework.beans.factory.config.PropertyPlaceholderConfigurer">
<property name="locations">
<list>
<value>classpath:config/mybatis/jdbc-mysql.properties</value>
</list>
</property>
<property name="ignoreUnresolvablePlaceholders" value="true" />
</bean>

<!-- 配置数据源 -->
<bean id="dataSource" class="org.springframework.jdbc.datasource.DriverManagerDataSource">
<property name="driverClassName" value="${jdbc.driverClassName}"></property>
<property name="url" value="${jdbc.url}"></property>
<property name="username" value="${jdbc.username}"></property>
<property name="password" value="${jdbc.password}"></property>
</bean>

<!-- 配置Session工厂 -->
<bean id="sqlSessionFactory" class="org.mybatis.spring.SqlSessionFactoryBean">
<property name="dataSource" ref="dataSource"></property>
<!--&lt;!&ndash; 加载mybatis-config.xml文件 &ndash;&gt;-->
<!--<property name="configLocation" value="classpath:config/mybatis/mybatis-config.xml"></property>-->
<!--自动扫描需要定义类别名的包,将包内的JAVA类的类名作为类别名-->
<property name="typeAliasesPackage" value="cn.edu.bupt.wen.model"></property>
<!-- 指定实体类映射文件,可以指定同时指定某一包以及子包下面的所有配置文件 -->
<property name="mapperLocations" value="classpath:sqlMapper/*.xml"/>
</bean>

<!-- 自动扫描所有的Mapper接口与文件 -->
<bean class="org.mybatis.spring.mapper.MapperScannerConfigurer">
<property name="basePackage" value="cn.edu.bupt.wen.mapper"></property>
<property name="sqlSessionFactoryBeanName" value="sqlSessionFactory"></property>
</bean>

<!-- 配置事务管理器 -->
<bean id="txManager"
class="org.springframework.jdbc.datasource.DataSourceTransactionManager">
<property name="dataSource" ref="dataSource"></property>
</bean>
</beans>
mybatis-config.xml
1
2
3
4
5
6
7
8
9
10
11
12
13
14
15
<?xml version="1.0" encoding="UTF-8"?>
<!DOCTYPE configuration PUBLIC "-//mybatis.org//DTD Config 3.0//EN"
"http://mybatis.org/dtd/mybatis-3-config.dtd">
<configuration>

<!-- 实体类,简称 -设置别名 -->
<typeAliases>
<typeAlias alias="User" type="cn.edu.bupt.wen.model.User" />
</typeAliases>
<!-- 实体接口映射资源 -->
<mappers>
<mapper resource="sqlMapper/UserMapper.xml"/>
</mappers>

</configuration>

注:在spring-mybatis.xml文件中配置session工厂时,如果配置了configLocation这一个property的话,需要指定mybatis配置文件的位置,如果配置了typeAliasesPackage和mapperLocations这两个property的话,就不再需要配置configLocation这个property了。

spring-thymeleaf.xml
1
2
3
4
5
6
7
8
9
10
11
12
13
14
15
16
17
18
19
20
21
22
23
24
25
26
27
28
29
30
<?xml version="1.0" encoding="UTF-8"?>
<beans xmlns="http://www.springframework.org/schema/beans"
xmlns:xsi="http://www.w3.org/2001/XMLSchema-instance"
xsi:schemaLocation="http://www.springframework.org/schema/beans http://www.springframework.org/schema/beans/spring-beans.xsd">

<!-- Thymeleaf View Resolver - implementation of Spring's ViewResolver interface -->
<bean id="viewResolver" class="org.thymeleaf.spring4.view.ThymeleafViewResolver">
<property name="templateEngine" ref="templateEngine" />
<!-- 解决中文乱码问题 template resolver中需要同时加上这个参数 -->
<property name="characterEncoding" value="UTF-8" />
</bean>

<!-- Thymeleaf Template Engine (Spring4-specific version) -->
<bean id="templateEngine" class="org.thymeleaf.spring4.SpringTemplateEngine">
<property name="templateResolvers">
<set>
<ref bean="templateResolver" />
</set>
</property>
</bean>

<!-- Thymeleaf Template Resolver -->
<bean id="templateResolver" class="org.thymeleaf.spring4.templateresolver.SpringResourceTemplateResolver">
<property name="prefix" value="/WEB-INF/templates/" />
<property name="suffix" value=".html"/>
<property name="templateMode" value="HTML" />
<!--解决中文乱码问题-->
<property name="characterEncoding" value="UTF-8"/>
</bean>
</beans>
web.xml
1
2
3
4
5
6
7
8
9
10
11
12
13
14
15
16
17
18
19
20
21
<?xml version="1.0" encoding="UTF-8"?>
<web-app xmlns="http://java.sun.com/xml/ns/javaee"
xmlns:xsi="http://www.w3.org/2001/XMLSchema-instance"
xsi:schemaLocation="http://java.sun.com/xml/ns/javaee
http://java.sun.com/xml/ns/javaee/web-app_3_0.xsd"
version="3.0">

<servlet>
<servlet-name>index-dispather</servlet-name>
<servlet-class>org.springframework.web.servlet.DispatcherServlet</servlet-class>
<init-param>
<param-name>contextConfigLocation</param-name>
<param-value>classpath*:config/spring/spring-mvc.xml</param-value>
</init-param>
</servlet>

<servlet-mapping>
<servlet-name>index-dispather</servlet-name>
<url-pattern>/*</url-pattern>
</servlet-mapping>
</web-app>
build.gradle
1
2
3
4
5
6
7
8
9
10
11
12
13
14
15
16
17
18
19
20
21
22
23
24
25
26
27
28
29
30
31
32
33
34
35
36
37
38
39
40
41
42
43
44
45
46
47
48
49
50
51
52
53
54
55
56
57
58
59
60
61
62
63
64
group 'cn.edu.bupt.wen'
version '1.0-SNAPSHOT'

apply plugin: 'groovy'
apply plugin: 'java'
apply plugin: 'war'
apply plugin: 'idea'

sourceCompatibility = 1.8

buildscript {
repositories {
jcenter {
url "http://jcenter.bintray.com/"
}
}
}

allprojects {
repositories {
jcenter {
url "http://jcenter.bintray.com/"
}
}
}

// 配置gradle的依赖项
dependencies {
compile group: 'org.codehaus.groovy', name: 'groovy-all', version: '2.4.7'
compile group: 'javax.servlet', name: 'jstl', version: '1.2'
// Slf4j
compile group: 'org.slf4j', name: 'slf4j-api', version: '1.7.22'
compile group: 'org.slf4j', name: 'slf4j-simple', version: '1.7.22'
//fastJson
compile group: 'com.alibaba', name: 'fastjson', version: '1.2.23'
//apache common lang
compile group: 'org.apache.commons', name: 'commons-lang3', version: '3.5'
//java servlet api
compile group: 'javax.servlet', name: 'javax.servlet-api', version: '4.0.0-b01'
// thymeleaf
compile group: 'org.thymeleaf', name: 'thymeleaf', version: '3.0.2.RELEASE'
compile group: 'org.thymeleaf', name: 'thymeleaf-spring4', version: '3.0.2.RELEASE'
// Aspectj
compile group: 'org.aspectj', name: 'aspectjrt', version: '1.8.9'
compile group: 'org.aspectj', name: 'aspectjweaver', version: '1.8.9'
compile group: 'org.aspectj', name: 'aspectjtools', version: '1.8.9'
// Spring
compile group: 'org.springframework', name: 'spring-core', version: '4.3.4.RELEASE'
compile group: 'org.springframework', name: 'spring-web', version: '4.3.4.RELEASE'
compile group: 'org.springframework', name: 'spring-webmvc', version: '4.3.4.RELEASE'
compile group: 'org.springframework', name: 'spring-jdbc', version: '4.3.4.RELEASE'
compile group: 'org.springframework', name: 'spring-aop', version: '4.3.4.RELEASE'
compile group: 'org.springframework', name: 'spring-context', version: '4.3.4.RELEASE'
compile group: 'org.springframework', name: 'spring-beans', version: '4.3.4.RELEASE'
compile group: 'org.springframework', name: 'spring-test', version: '4.3.4.RELEASE'
// MyBatis
compile group: 'org.mybatis', name: 'mybatis', version: '3.4.1'
compile group: 'org.mybatis', name: 'mybatis-spring', version: '1.3.0'
compile group: 'mysql', name: 'mysql-connector-java', version: '5.1.40'
// junit
compile group: 'junit', name: 'junit', version: '4.12'

testCompile group: 'junit', name: 'junit', version: '4.12'
}

下载gradle依赖包

至此,基本的配置就完成了,接下来就需要运行gradle下载相应的依赖包了,
操作如下:打开IDEA > View > Tool Windows > gradle:

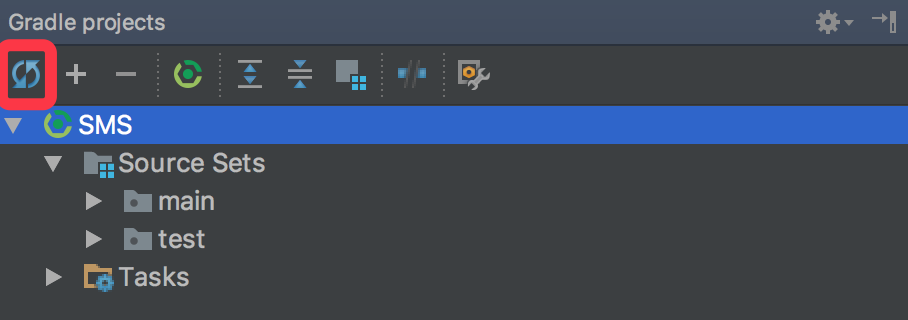
点击图中的按钮,IDEA就会自动下载依赖包了。

下载完成后,目录下的External Libraries文件夹会生成相应的目录:

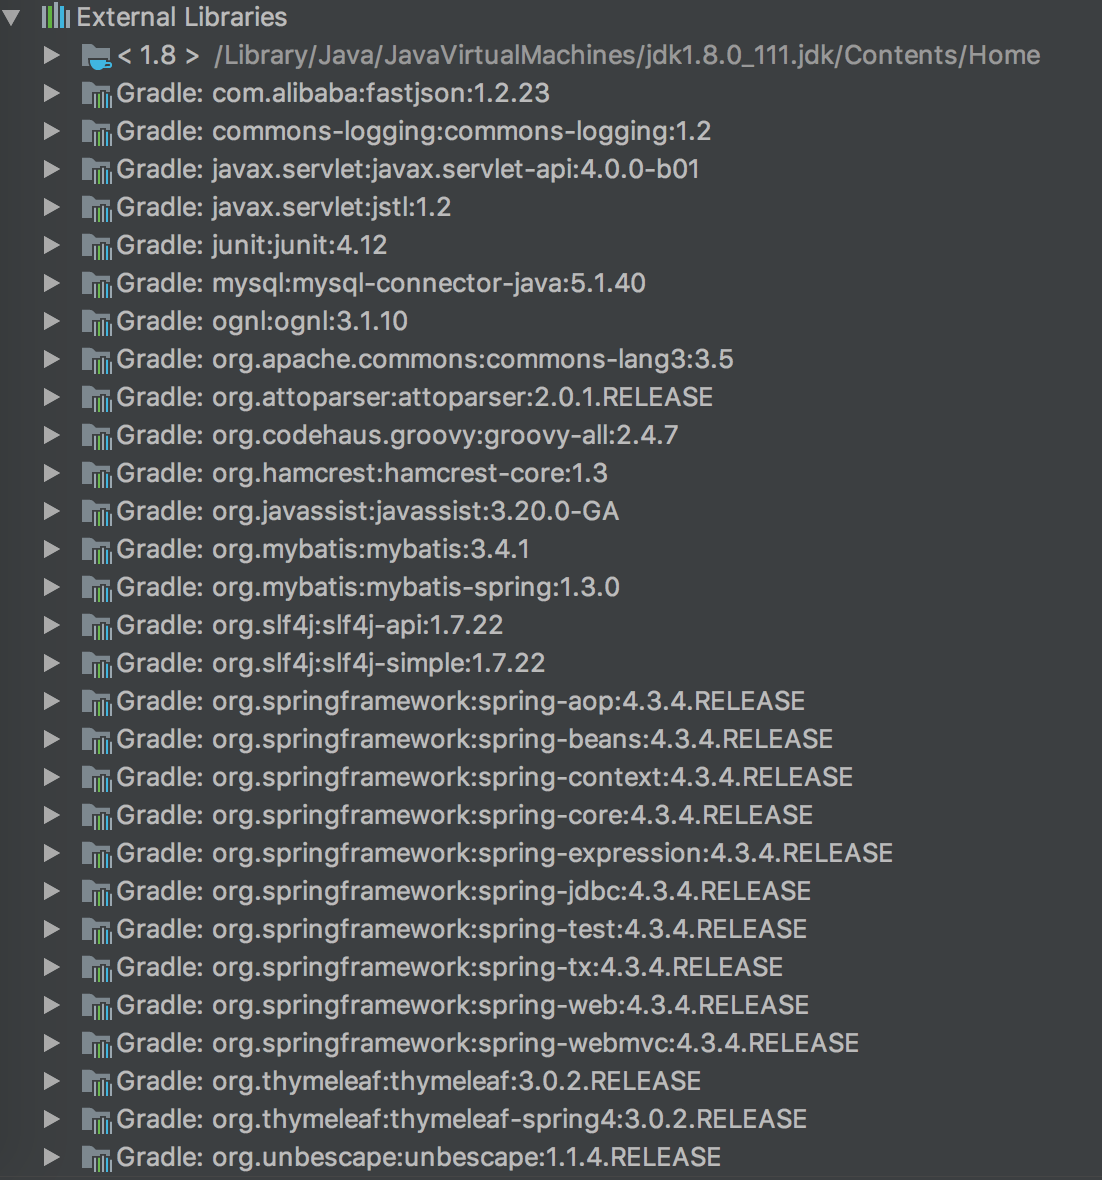
下载完依赖包之后,整体的配置基本上就完成了。

部署到Tomcat服务器

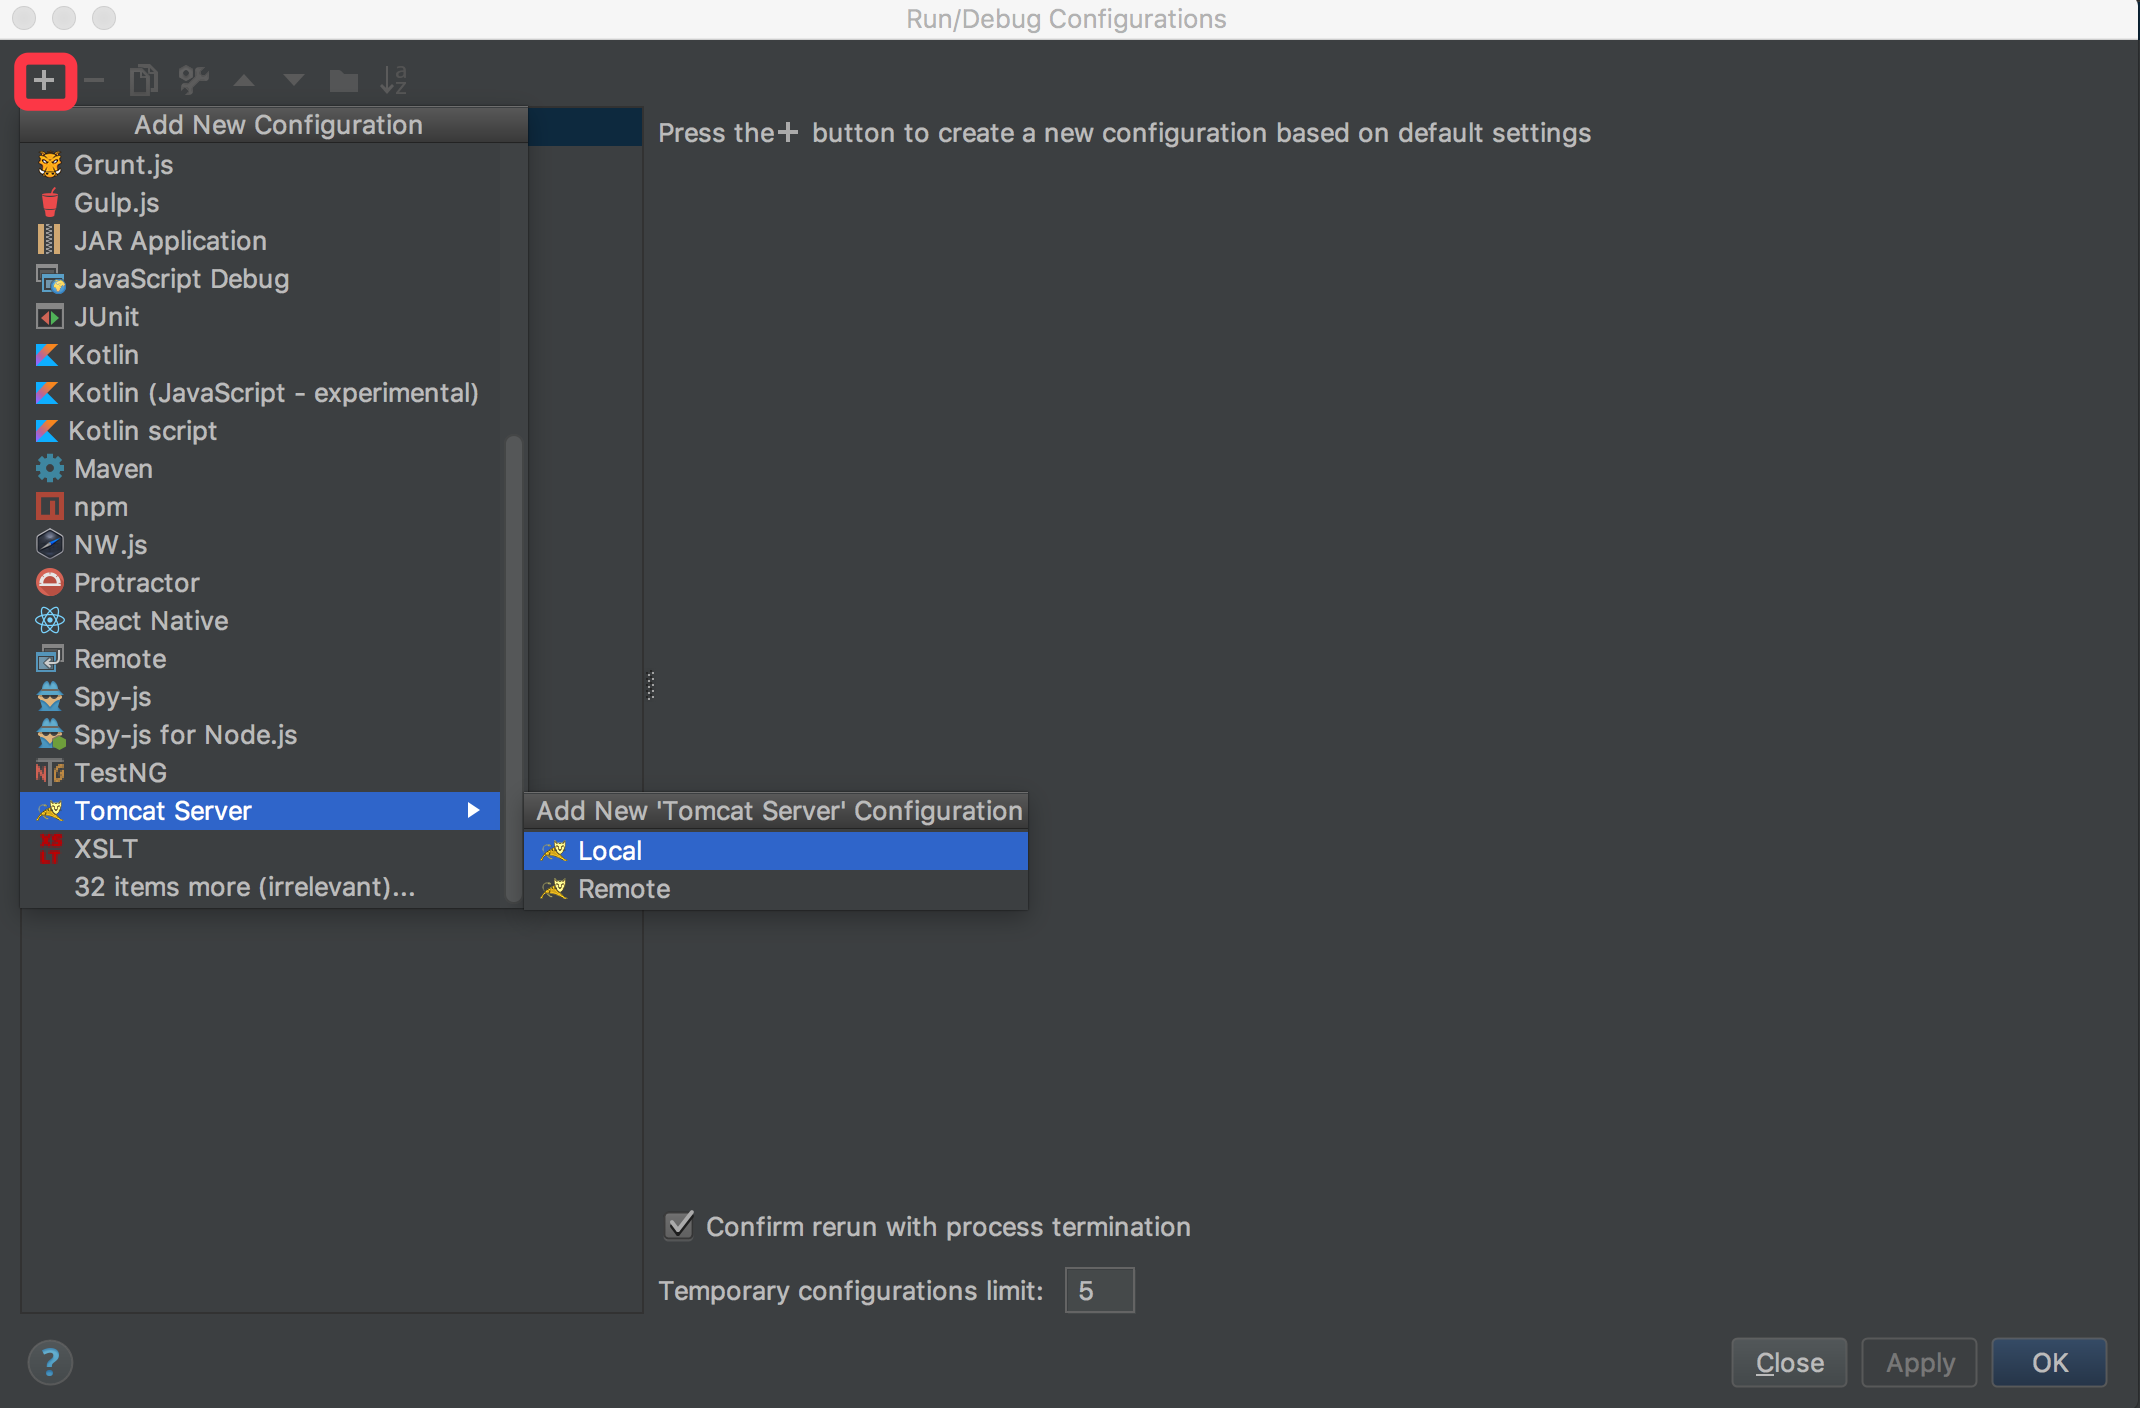
打开IDEA > Run > Edit Configurations...

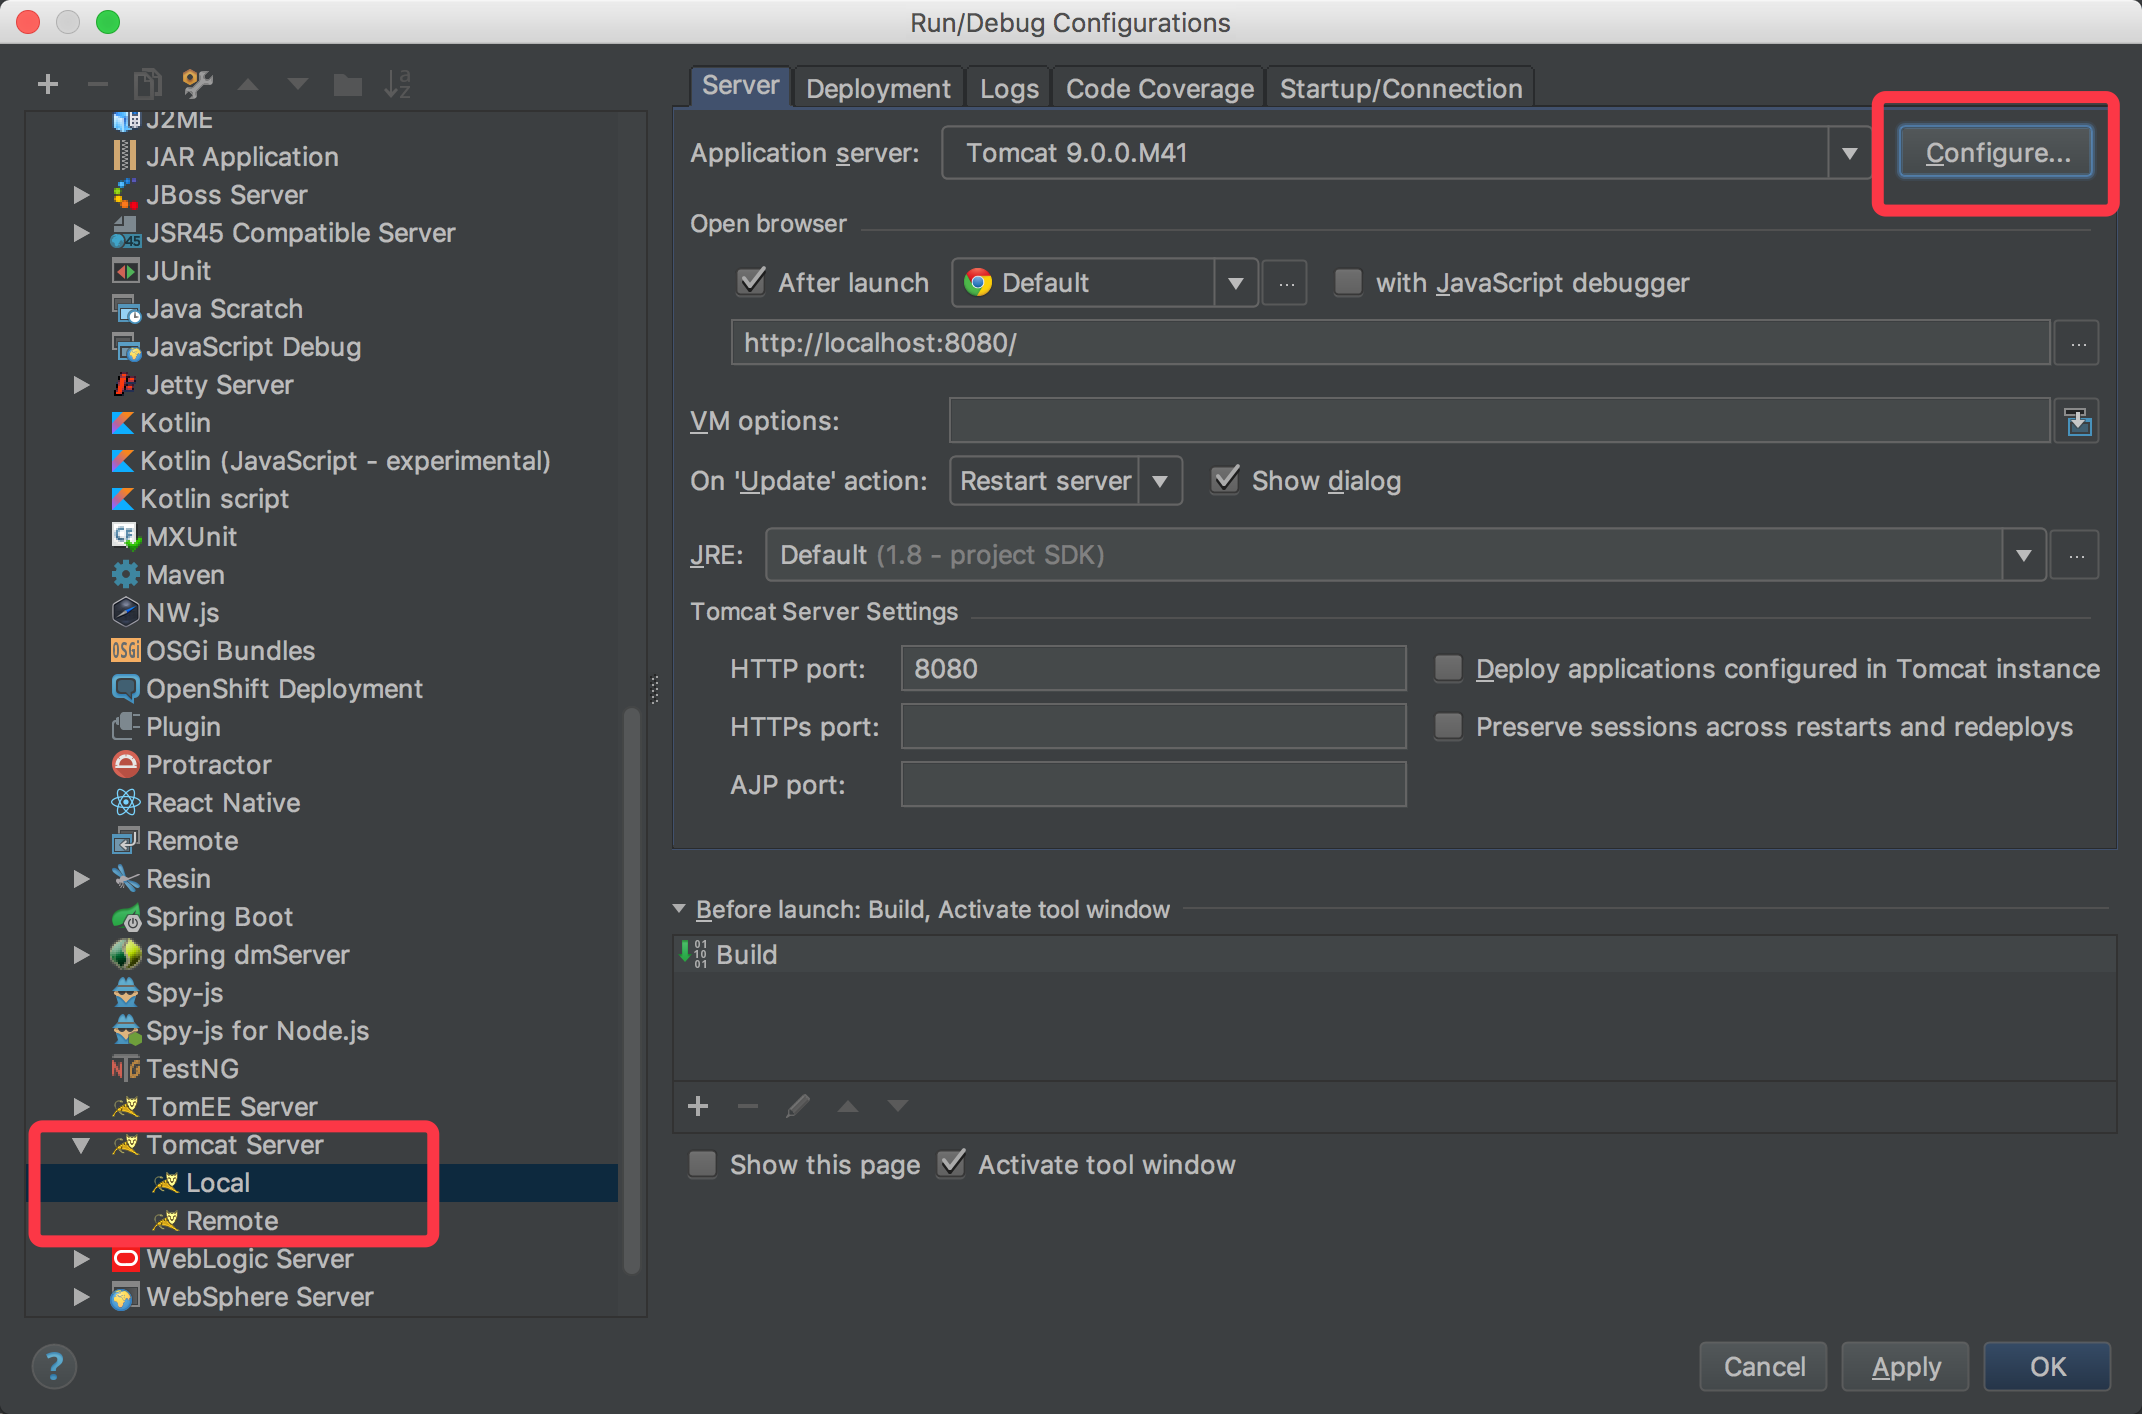
点击tomcat server的local选项,点击右上角的configure...
在弹出的对话框中选中下载的Tomcat根目录:

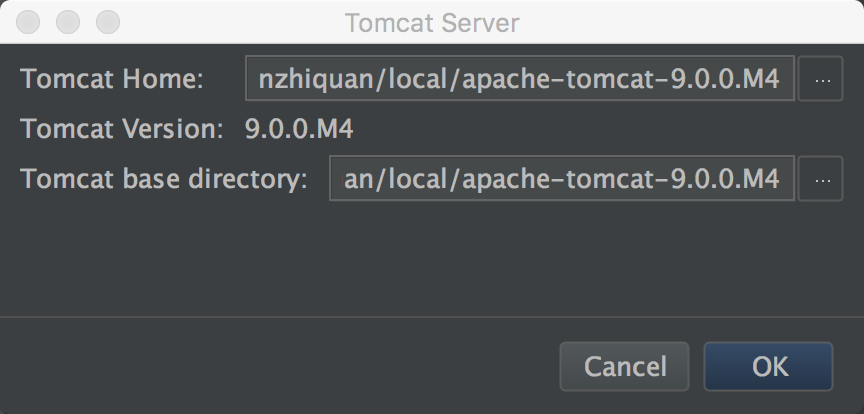
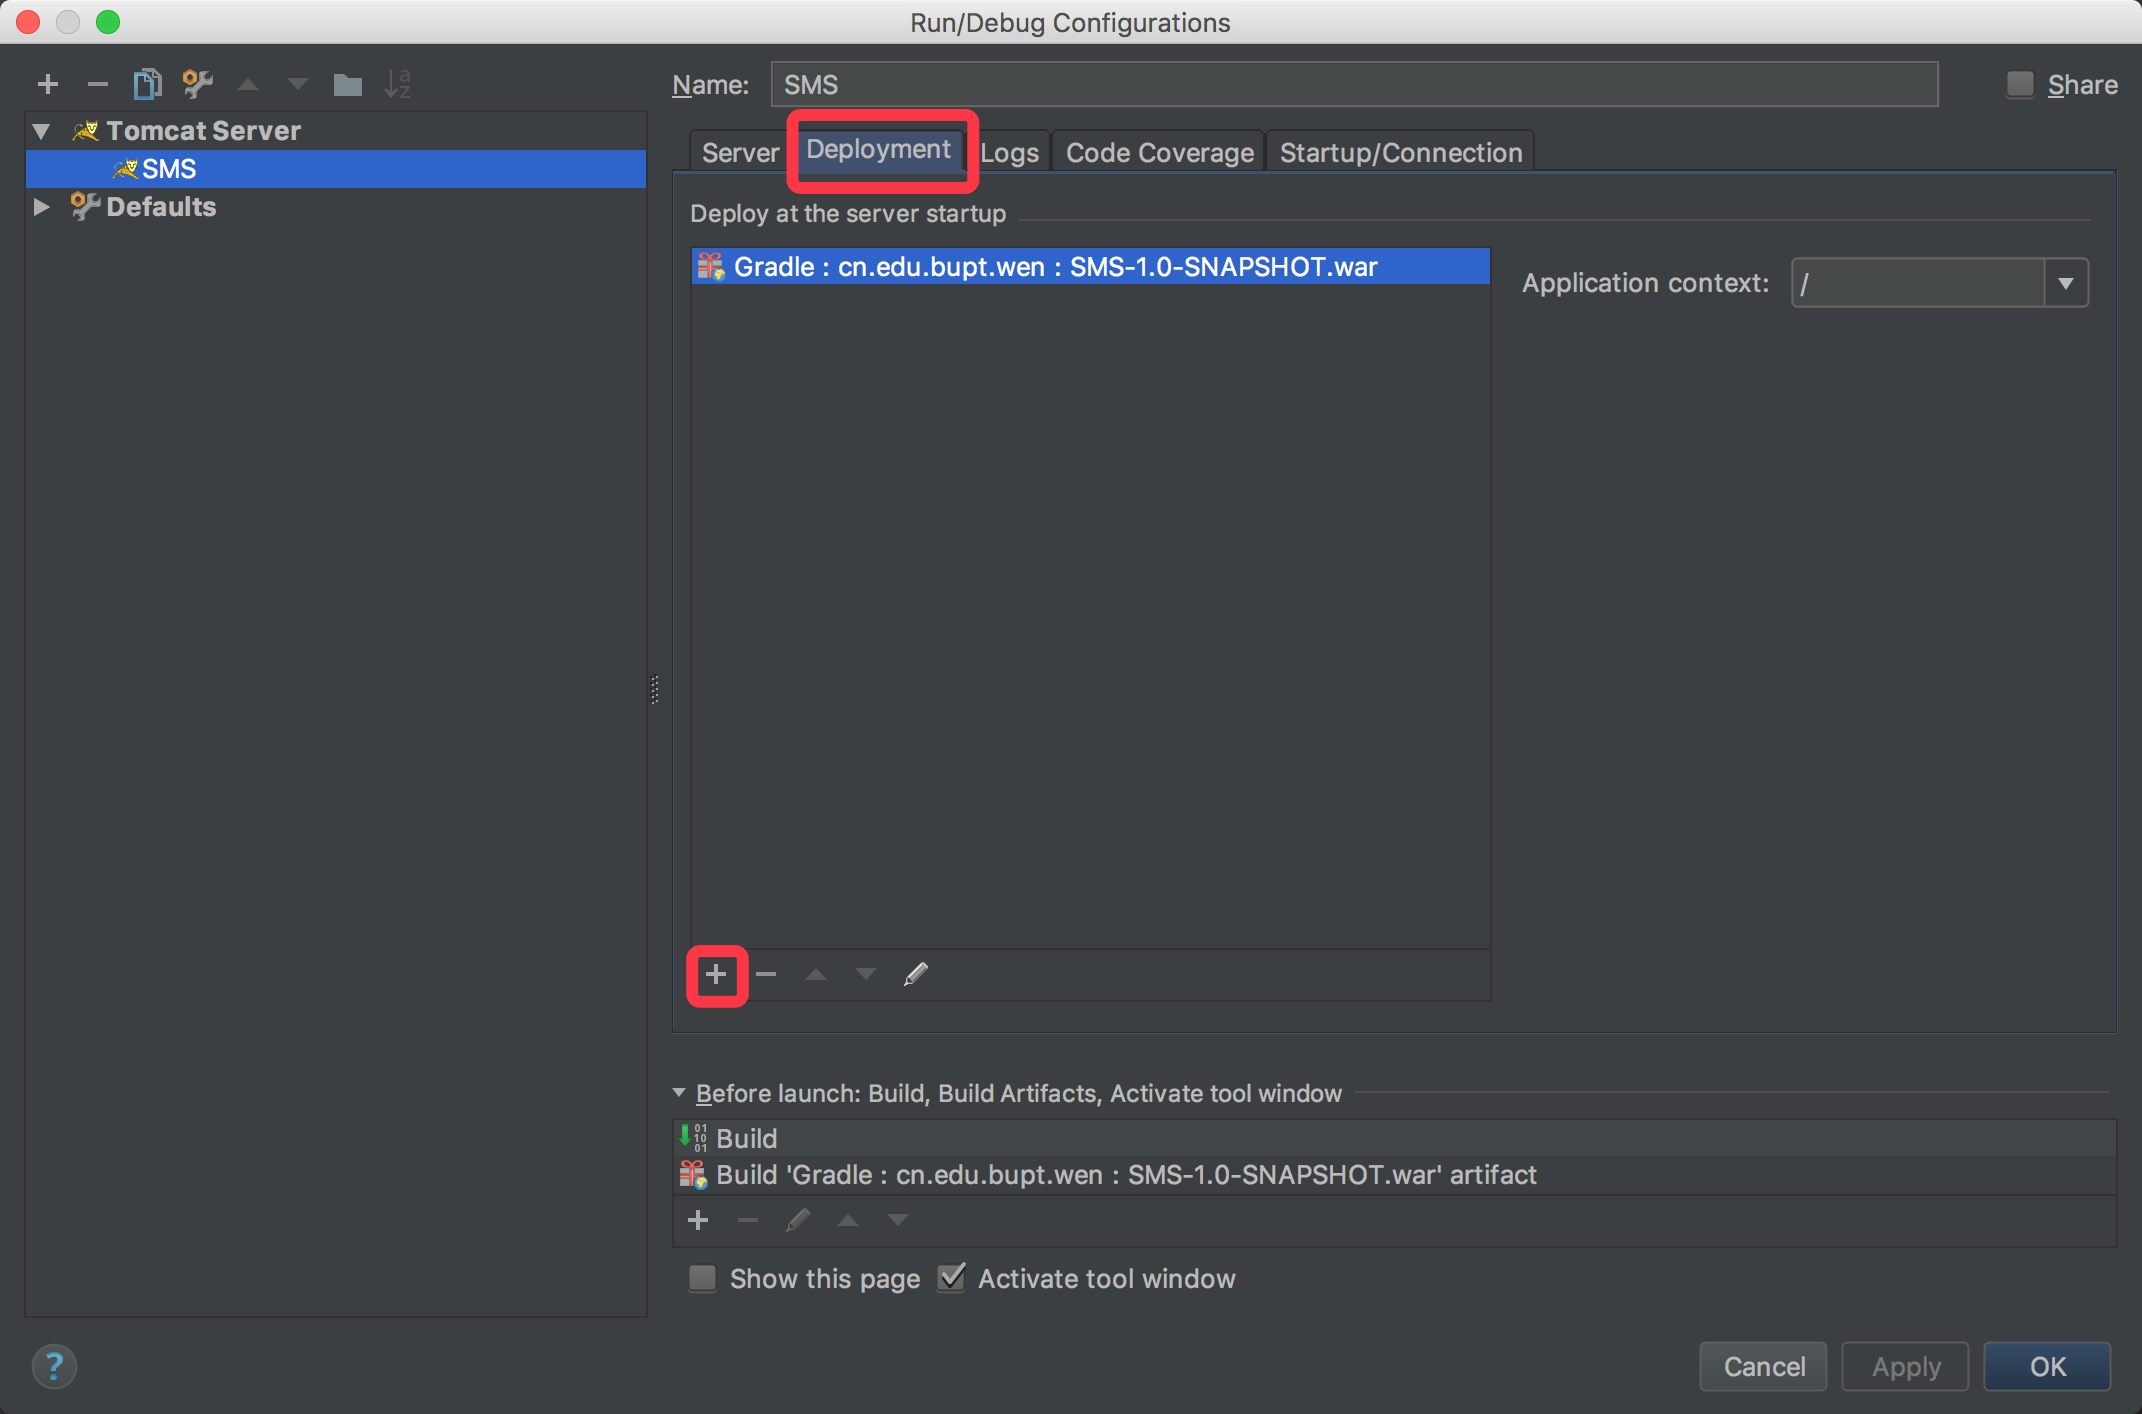
然后将配置好的tomcat添加到运行库当中:

然后在Deployment选项卡中添加项目即可:

编写代码并运行

编写controller代码

在controller文件夹中创建IndexController文件,将代码修改为:

1
2
3
4
5
6
7
8
9
10
11
12
13
14
15
16
17
18
19
20
package cn.edu.bupt.wen.controller;

import org.springframework.stereotype.Controller;
import org.springframework.web.bind.annotation.RequestMapping;
import org.springframework.web.bind.annotation.RequestMethod;
/**
* Author wenzhiquan
* Created on 16/4/12 下午12:25
* File name: IndexController.java
* Description: null
*/

@Controller
public class IndexController {

@RequestMapping(path = {"/", "/index"}, method = {RequestMethod.GET})
public String index(){
return "index";
}
}

修改index.html

将index.html文件修改为自己想要的样式:

1
2
3
4
5
6
7
8
9
<!DOCTYPE html>
<html>
<head>
<title>Index</title>
</head>
<body>
Hello World!
</body>
</html>

运行Tomcat

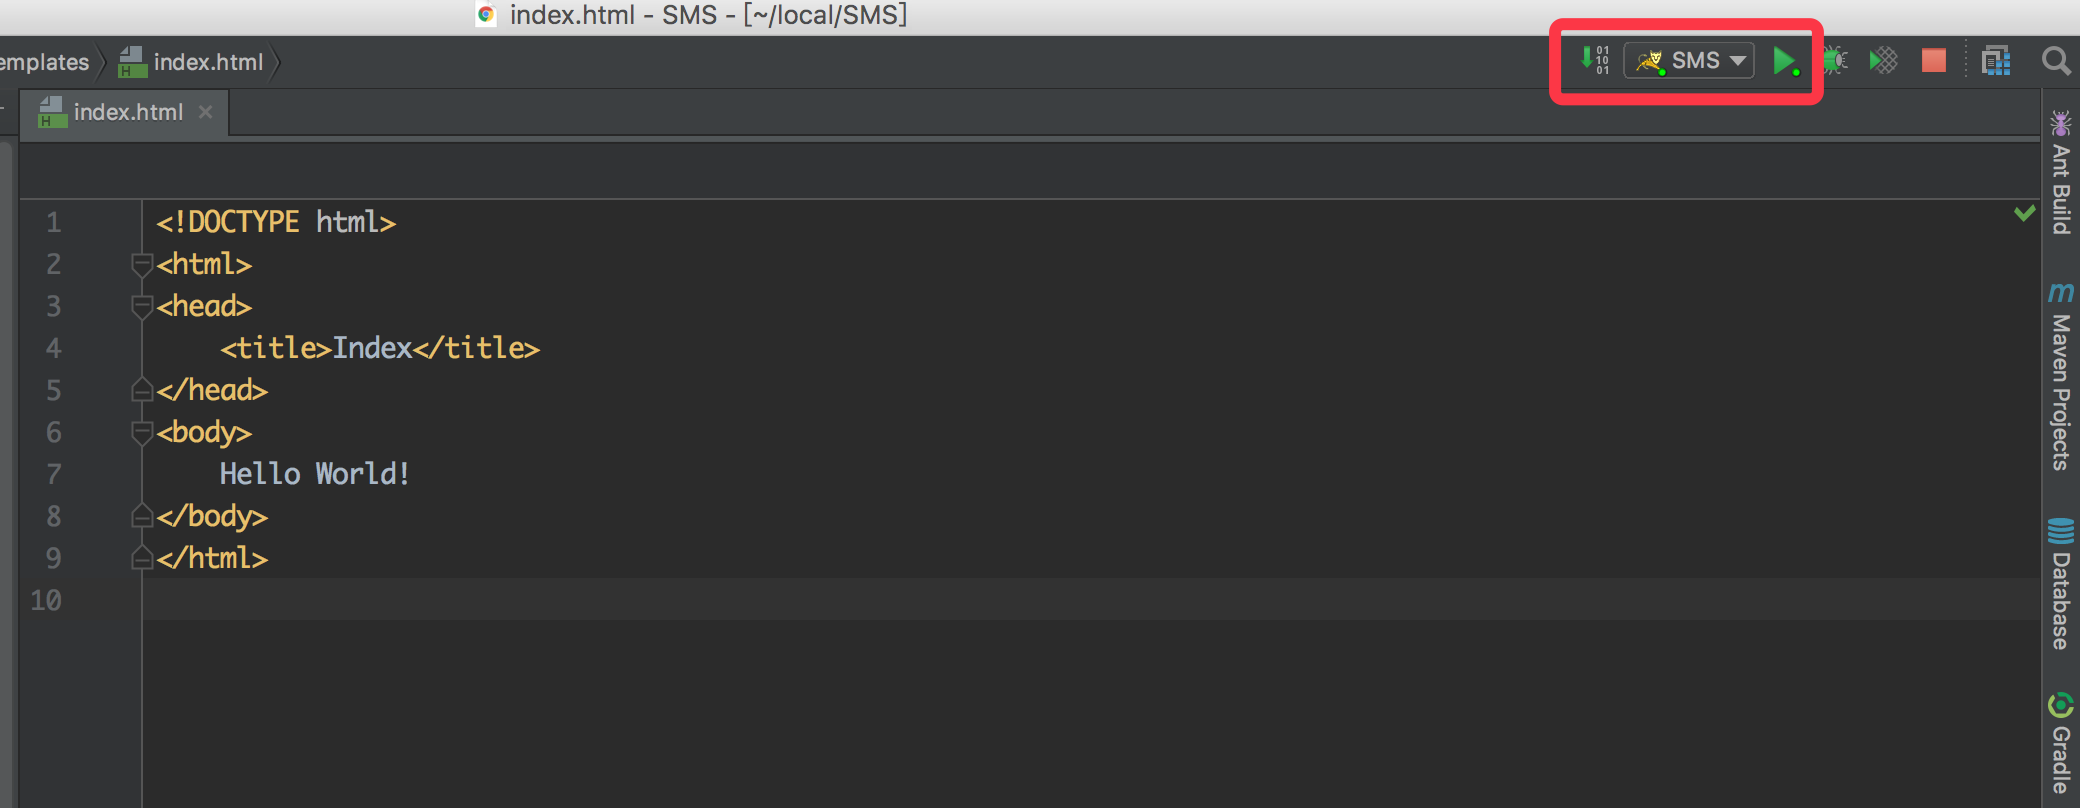
点击运行按钮,服务器启动后会自动启动浏览器进入主界面:

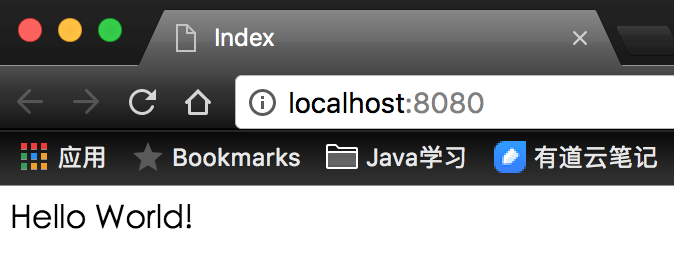
至此,hello world程序已经完成。